Rebuilding the Vacuum Pump
(123 Chassis 79 300TD)
(See below for some pix of the 82 126 300SD)
The vacuum pump on Brunhilde quit vacuum pumping, resulting in no brake assist and no shutoff. I put the MityVac on it and it was pulling only 12" or so, then nothing a couple of days later. Then it started belching oil out the suction tube that comes from (goes to) the air cleaner. So, time to tackle a rebuild.
This is not hard so do not be intimidated. It is a bit fiddly, so just work carefully.
Parts
I ordered the appropriate parts from http://parts.mbz.org/
D3010-11797 Vacuum Pump Repair Kit Febi $15.11
D3010-11798 Vacuum Pump Repair Kit Febi $14.24
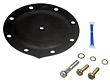
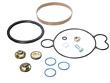
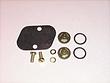
The top part kit is for the internal valving and the lower kit is for the diaphragm, which is what failed. I think it worth it to do both while you are in there. There is also a vac pump gasket that goes between the pump and the engine block, which I did not order (did not know I needed it) and not sure what part number that is. I reused the old one (which was stuck on the pump) and just put a bit of gasket sealer on it when I put the pump back on. Seems to have worked OK.
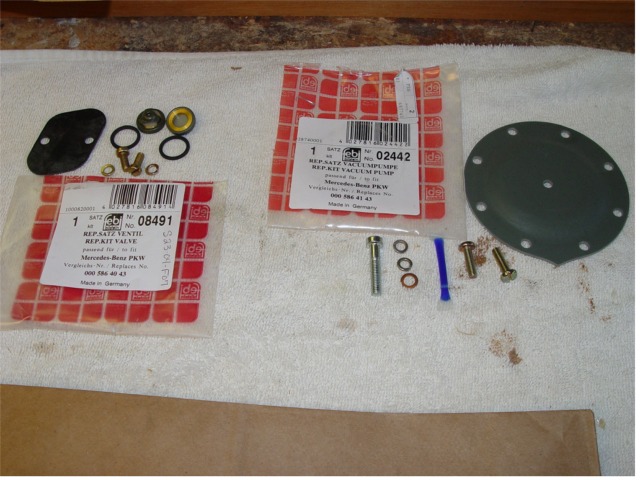
Parts on the bench
This is a good time to replace the 3 belts too, since you (might want/ need) to loosen them to do the vac pump-- PS, alternator, AC. I ordered them but don't have the part numbers.
Manual Sections
The sections of the manual that detail this repair are:
43-610 Removal and installation of single diaphragm vacuum pump
43-620 Replacing diaphragm and plate valves of single-diaphragm vacuum pump
and if you need it:
43-630 Replacing rocker arm of single diaphragm vacuum pump
These are found in some obscure section of the CD, under Brakes or something if I recall.
The Procedure
There is a tool "Assembly plate for diaphragm rod" called for that makes the procedure easier. I used a piece of plywood and a couple of smaller pieces of plywood for a shim, and screwed the pump to the larger piece with drywall screws. You will see it below. It worked well.
Go degrease/clean the engine well at the quarter car wash, especially around the vac pump and around/behind the power steering pump above. The engine will be open when the vac pump comes off and you DO NOT want anything to fall in there. Plus it is easier to get the pump screws off if they are clean and not greasy.
Set up a table next to the car to hold your tools and parts that you remove. This will keep you sane. If you are tall like I am it would be easier with the front of the car on ramps so you don't have to bend over so much to get at the pump and stuff, but that is your call. It was killer on my back.
Taking the pump off the engine
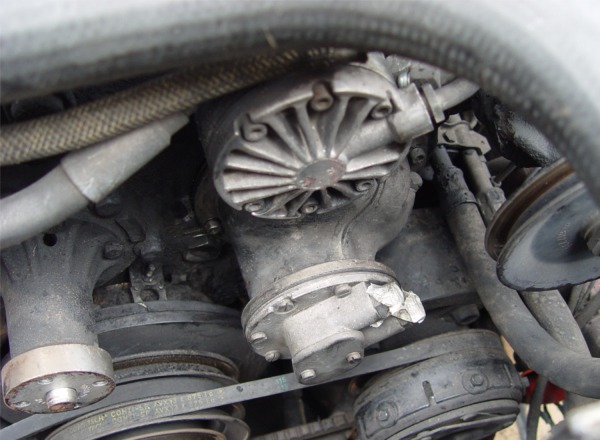
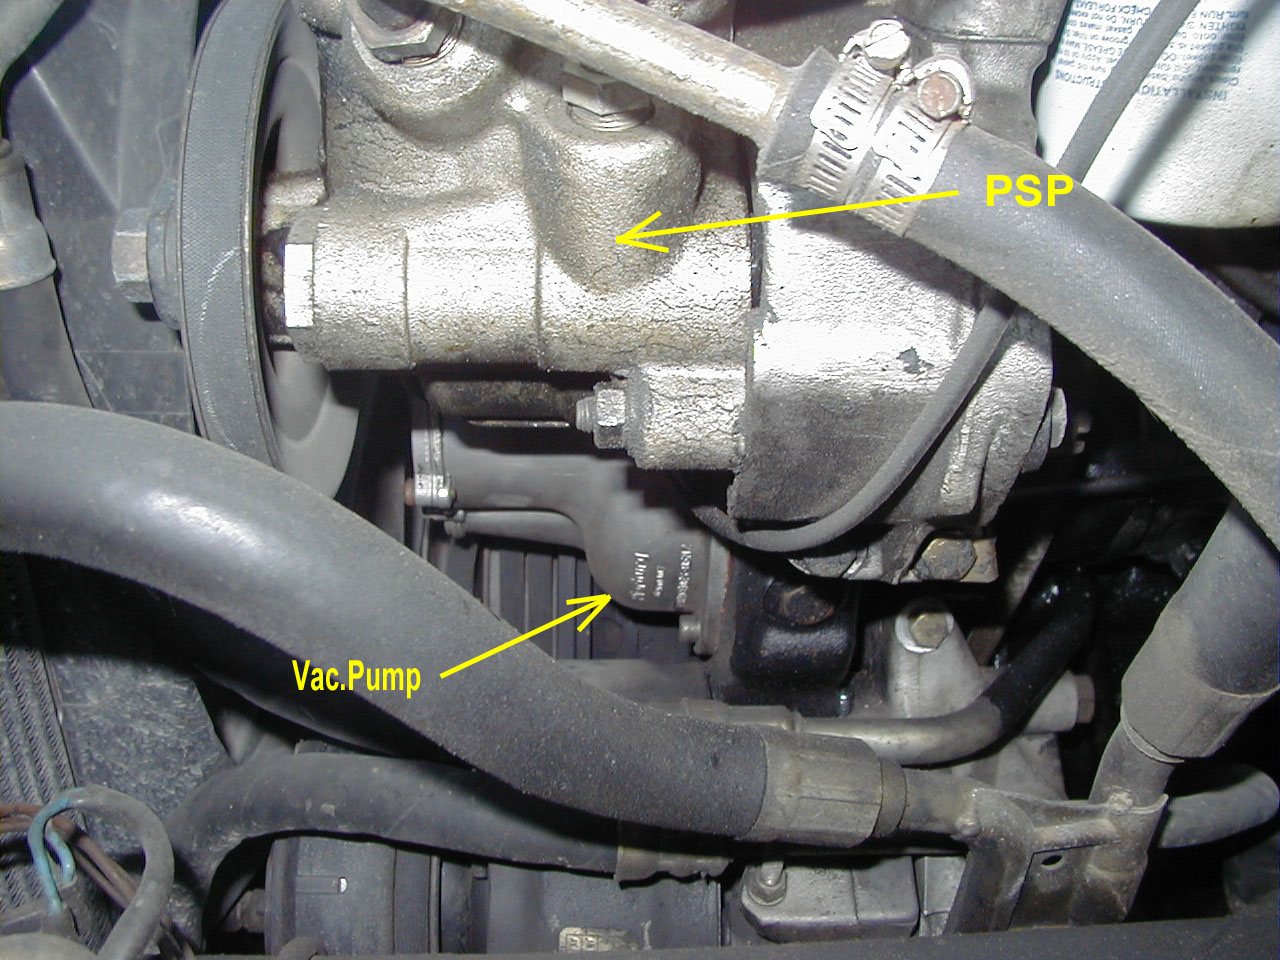
The pump is sorta below the power steering pump (see the pulley to the upper right of it) and above the AC compressor, and below the hydraulic pump on the wagon. See below regarding the PS pump and belt. You gotta take some other stuff off before you can get at the pump.
Loosen the alternator tensioner with a 13mm socket. Take off belt. Remove the fan and fan shroud. The shroud has 2 clips at the top and tabs at the bottom, and lifts straight up (and a bit sideways to clear the upper rad hose). The fan has 4 10mm bolts that hold it and the water pump pulley to the water pump shaft. These are a bit fiddly but come off easy. A ratcheting wrench would probably work better here than a regular wrench. Remove belt, pulley. I think the fan needs to remain upright when you set it down or the fluid in it will drain out. I think I got that tidbit of info from the diesel list.
Remove 2 vac hoses from the pump. A 17mm on the pump connection nut and a 19mm on the hose nut. Put some tape over the holes on the pump. It is worthwhile to clean out these hoses at this point, especially if oil was blowing out them. (Oil leaked through the tear in the diaphragm and then got pumped up the tube, and it made a truly nasty mess in the air cleaner and then when that ran out the air cleaner housing onto the manifolds and the driveway.) A little degreaser sprayed in one end, with an air blow following does the trick. Repeat as necessary. Clean out the air cleaner and the rest of the engine bay as well if you have to.
Loosen the power steering pump and remove the belt. This is not entirely necessary but it makes the job easier. If you want to go ahead and remove the whole PS pump it will make the job much easier (you can actually see and reach most of the VP bolts) and is not hard to do (only 3 13mm bolts at about 3, 7, 10 o'clock). Just rotate it up and lay it on the inner fender or wherever, leaving hoses attached. This will give you a good opportunity to clean well in there too, as it is catch spot for lots of grease and dirt. Note that on my car the little plastic adjuster nut inside the bracket/behind the PS pump was broken (there is a bolt head on the top right of the bracket that adjusts the belt tension by going through this thing), so that tightening the pump later on was hard to do. You might want to order one of these just as a matter of course, since it is plastic and will likely fail at some point soon if it has not already failed. I did not have one, so getting the thing back on with the belt tight was a PITA but finally worked with some prying under it with a wood piece about 8" long for the fulcrum and a pry bar levering on that to lift the PS pump up enough to get the belt tight. I have to order one next time I get a bunch of parts.
Now remove the vac pump with a 5mm hex (allen) wrench, 6 bolts evenly distributed around the pump. A 6" wobble extension with a small swivel stubby ratchet (cheap at Harbor Freight) makes this easier. You can see that setup in the pic below. It is not easy to see/reach the 6 little bolts, so some feeling is necessary. And it helps if it is really clean.
Clean, drain, degrease, etc. the pump. There is an oil fill bolt on top that has a little magnet on the end of the bolt. You might want to take this out and check it, either now or after you put the pump back on the engine.
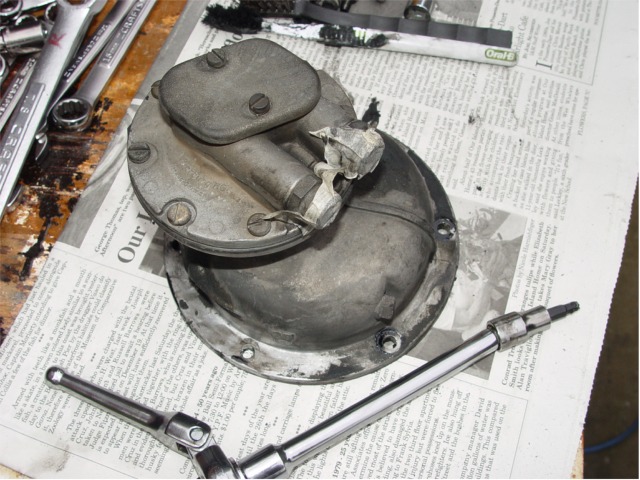
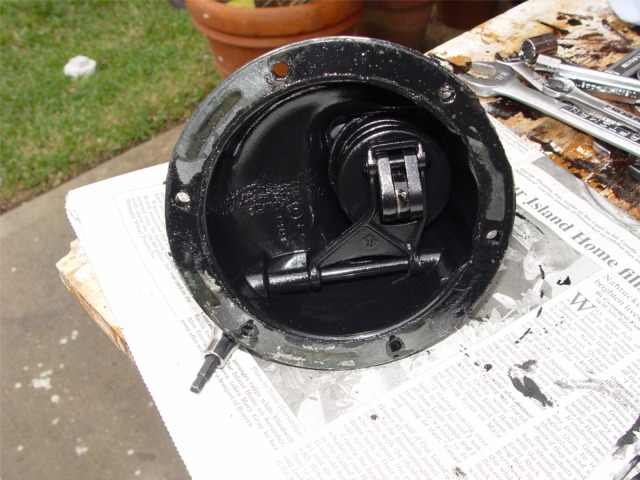
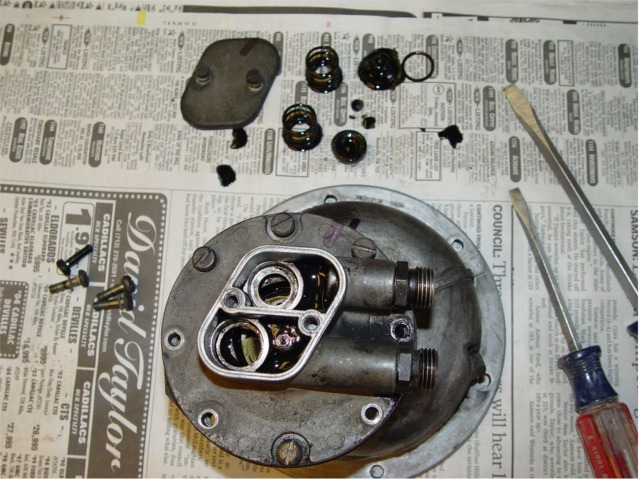
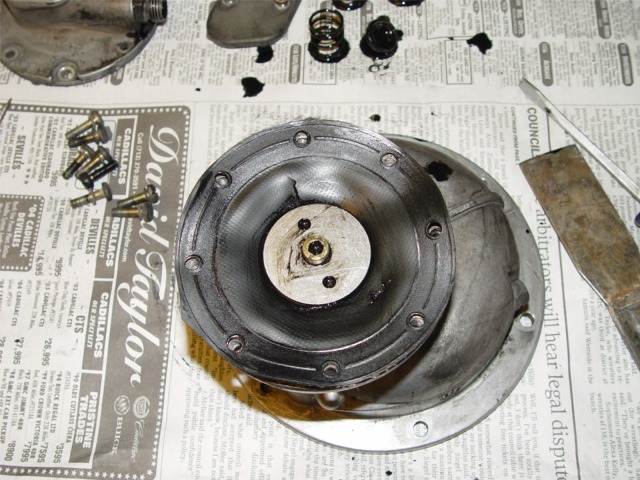
Pump Top Pump Bottom Pump with Closing Cover Off Pump with Pump Cover Off
The instructions on restoring the pump are clear. (Note the tear in the rubber diaphragm, at about 12 o'clock in the pic above.) Just be sure to mark the two pump housing pieces so they line up right when you put them back together, and note which valve goes in which hole which way. (I put them on the paper in the right configuration when I took them out, so I could refer to them when I put the new ones in.) And you don't need that other tool that is mentioned, to hold the top diaphragm washer (plate) from rotating when you tighten the the bolt. You can just hold it with your finger.
The Assembly Plate tool that is mentioned is only to hold the pump shaft up while you put on the diaphragm, and keep it all sorta even so the diaphragm isn't stretched. This makes assembly easier and takes stress off the rubber diaphragm. The shaft needs to be held up 26mm which is close enough to 1". So, cut two pieces of 1/2" plywood scraps about 3in diameter, and stack them to make a 1" shim to fit inside the pump housing, place these on a larger piece of plywood, and screw the pump down over them onto the plywood so that the 1" shim pushes the rocker arm/shaft up. This thing has a strong spring so make sure it doesn't energetically dissociate while you are screwing it on/off. In the second pic below the Pump Cover is already back on -- I forgot to get the pic with it off -- but you can see it screwed down over the two 1/2" plywood shim pieces.
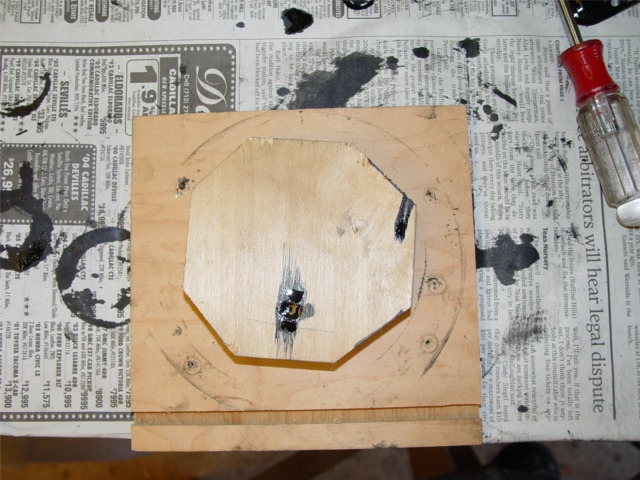
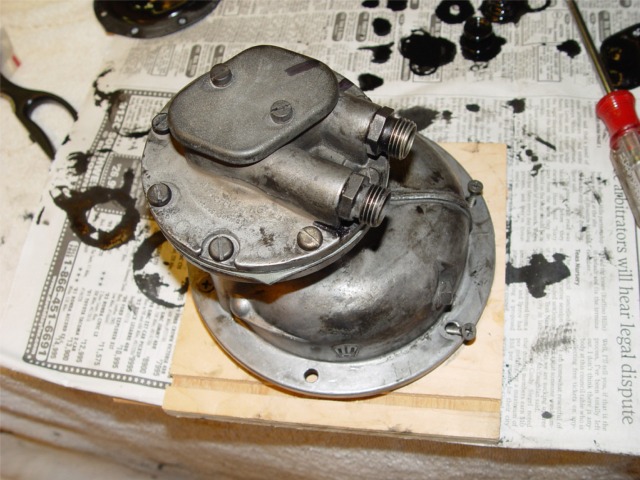
Plywood Tool Pump Mounted on Tool
Reinstall on the engine. You might have to rotate the engine CLOCKWISE ONLY (large 1 3/16" ? socket on crank pulley/damper nut) to get the cam on the pump drive to line up "bottomed" with the pump rocker arm roller; otherwise, you will have to fight the rocker arm spring to get it attached. (See pic below) As it is there is about 1/4" of push on the arm, you need to take this up with the bolts when you tighten them. I did not get another gasket and used a thin bit of gasket sealer on the old one, which seemed to be OK.
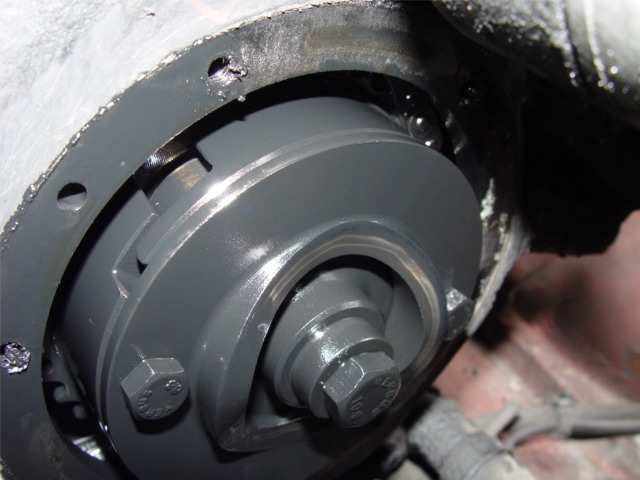
Pump Drive Cam on Engine
There is mention of checking oil level in vac pump (section 704?) for cars 73-75. Engine oil will splash into the pump so I don't think it was necessary to add oil to mine, though I tried but it wouldn't go down in the hole. It isn't much anyway, and if there is a bit of lube on the internals it will be fine until it gets splashed from the engine oil.
Replace belts, PS pump, fan, shroud, etc. and fire it up! I was pulling 22" of vac with the new innards, and everything was back to working fine.
Enjoy the car!!!
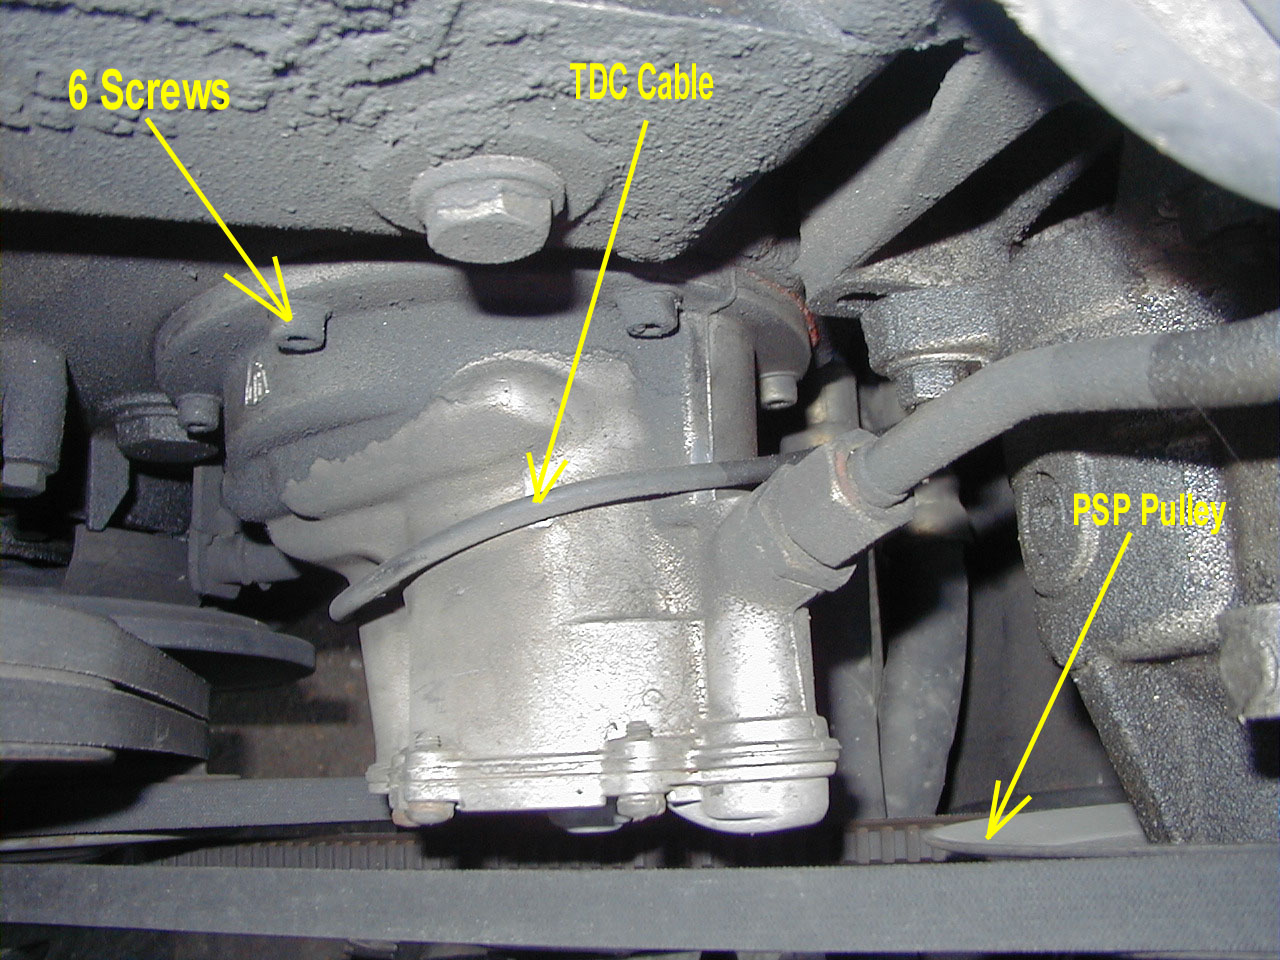
82 300SD (126 chassis)
Another guy in Houston, Hans Neureiter, sent me some annotated pics of his 82 300SD vac pump, says "I used a 1/4" ratchet with 3" extension and allen socket. Don't remember the size (4mm ?). The lower screw close to the crank is tough since one can't see it."
This car takes a different kit to rebuild the pump:
D3010-11793 Vacuum Pump Repair Kit $65.99